
What does this gardener do when the weather turns cold and grey? She taps into her artistic side and gets crafty! One of my recent projects is a grapevine topiary.
Here is how I made it.


Materials & tools you need to make a grapevine topiary:
• A grapevine sphere (I found mine at Michaels)
• Bundle of grapevine twigs (sold in a bundle also at Michaels)
• 24 gauge copper colored wire (look for colored wires in the jewelry section at the craft store)
• wire cutters
• Pruners or scissors to cut the grapevine (not shown)
• Wire coat hanger or wire of a similar gauge (not shown)
• A 6" pot of your choice (I found my pot at Walmart)
• A 4" pot or green or variegated ivy (if you can, choose an ivy that already has long tendrils)

Step 1: In step one, you are going to create the wire framework that will be hidden inside the trunk of your topiary. Take an old wire coat hanger, score it with your wire cutters, and then cut it. Straighten the wire and cut the full length in half.

Step 2: Wrap one end of the two pieces of coat hanger wire with the copper 24 gauge wire to hold them together.

Step 3: Select a number of straight pieces from the bundle of grapevine twigs.
Cut eight to ten grapevine twigs to be the desired length of your topiary's trunk. For the outdoor topiary I made, I cut 12" lengths (the outdoor version is shown at the end of the post). For the indoor topiary, I cut 6" lengths of grapevine.

Step 4: Place your coat hanger wire in the centre of the twigs you just cut. Try to hide it as much as possible with the twigs. Wrap the top of the bundle with some of the 24 gauge wire. (Note: we got a little carried away here with our wrapping. Circling the bunch 6-8 times will do!)
Next wrap the bottom of the twigs in exactly the same way. Here's what you end up with:

As well as adding strength to the trunk of your topiary, the wire supports the topiary structure underground. Twigs on their own would only rot in the damp soil of your plant pot.
Now to attach the topiary's sphere!

Step 5: Locate the metal framework inside the grapevine sphere. Now look even closer until you find the join where the three parts of the metal frame meet.
Take a length of 24 gauge wire and insert it into the sphere, around that join in the framework, and then back out of the sphere.

Step 6: Feed one of the ends of the wire through the trunk and out the other side. Feed the other end of the wire through the trunk in the opposite direction and out the other side. Pull the ends of the wire tight until the ball is joined to the trunk. Alternating with one end of the wire and then the other, pass each of the ends of the wire back up through the sphere and then down and around the trunk.

For one final bit of security, we ran one more loop of wire from the top of the sphere to the bottom of the sphere and then wrapped the loose ends around the trunk of the topiary (see red arrows above).


Step 7: Pot up your ivy and then insert the finished grapevine topiary.
Take one of the long ivy tendrils, and moving upward, twist it around the trunk of the topiary. When you get up to the sphere, weave the end of the ivy in among the grapevines. Don't cut the ivy off when you get to the end! Leave the ivy tendril and allow it to grow further. As the new leaves appear along the length of the stem, continue weaving them into the sphere.
To make the shape of the topiary cleaner, go back and pinch off any ivy leaves that obscure the trunk.

Ongoing Care: I have had numerous ivy topiaries over the years, so I feel confident in predicting that it may take 4-6 months before a topiary will fill in and look as full as the one you see here.
As far as ongoing care, keep working any new growth at the base of the topiary upward. Weaving the fresh foliage into your frame or trim any excess to maintain a neat, rounded shape. To keep my ivy healthy, I use a water soluble fertilizer every other watering.
The only problem I have had with my topiaries is spider mites. Ivy seems particularly susceptible to spider mites. If you see faded leaves and fine webbing, treat the plant with repeated applications of insecticidal soap.


We are well into the holidays, so you may want to give your topiary a seasonal look. With the change of container, this grapevine topiary has a whole new look:


Love the idea of creating an ivy topiary, but don't want to have to craft your own frame? No problem!
You should be able to find ready-made topiary frames online. By way of example, I found a few options at the Gardener's Supply Company. On the left are their Cone Topiary Frames and on the right are their Twist Topiary Frames.
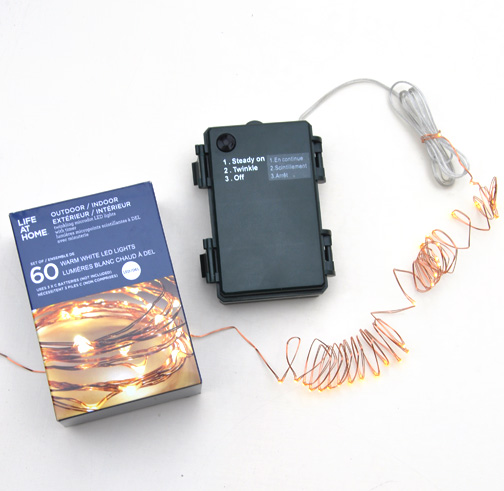
One final twist on my grapevine sphere. This year there seems to be lots of terrific, inexpensive LED lighting options available. In the past, Christmas lights always meant ugly wires in the daytime and long extension cords.
Now, with these new LED options, the lights are on a fine filament that virtually disappears into the greenery of an arrangement. With the battery packs, there are no long electric cords.
I found this set of 60 lights at The Real Canadian Superstore. The copper-colored string of lights seemed like it would be perfect to wrap around one of my grapevine spheres. In the daytime, the copper filament all but disappears. At night, the tiny LED lights add a sparkle to my holiday urn.

Have a great weekend!
P.S. The announcement of the book draw winner is coming up next!
I always love topiaries and yours turned out really nice. Also thanks for showing us how. I love the LED lights, and have heard they are called fairy lights..I've picked up a few sets and have become addicted to them.
ReplyDeleteJennifer, this is just beautiful!!!
ReplyDeleteThank you so much for sharing your "how to" here.
It is truly appreciated.
Have a wonderful weekend, my friend!
Jennifer what a creative lady you are. Great post.
ReplyDeleteHave a wonderful sunday.
You are so creative Jennifer and I love your topiary! Also, thank you for stopping by my blog. I would love to take you up on your offer! Great post!
ReplyDeleteYour topiary is just lovely, the difference changing the pot made. I loved both of the sideboard displays, the lights finish off your display beautifully.xxx
ReplyDelete